Garlic and Dill Pan-Roasted Taters
Permanent link All PostsGrowing up, springtime used to be my favorite time of the year. The birds seemed to chirp more happily, the frigid cold breezes turned into warm drafts and brand new baby potatoes emerged in all the farmers markets in my home town.
You see, to you this may not be a huge deal, but back in the old country where I was born, Moldova, food was available seasonally. We did not have tomatoes in the winter, for instance, so we fermented them and canned them so we could eat them year round. Babushka (please refer to this post for more info on who she is and a proper lesson on the pronunciation) was the captain of fermenting and canning.
However, as many canning and fermenting specialties as babushka had, her cooking skills were hard to mess with. And of her many dishes, none beat her garlic and dill baby potatoes. These little baby potatoes were sweet and almost buttery in texture. (Of course it helped that babushka added a few tabs of butter in there to sweeten the deal.)
She made them ever so simply just by boiling these little new potatoes and then once they were drained adding in a healthy amount of chopped garlic, fresh dill and creamy butter. They were always served in the same pot they were made in so that they could stay warm. Everyone in the family always snuck a taste in before they hit the table while babushka wasn’t looking.
The house instantly filled with smells of dill and garlic and everyone always ran to the kitchen ready with fork and knife in hand to quiet the grumbles in their bellies.
Typically we had these on a Sunday early dinner, paired with mama’s famous shishleek (pork kebobs) and a simple salad of fresh tomatoes, cucumbers and green onions. It was a modest meal filled with robust flavors that enticed everyone to smile a little brighter and laugh a little louder. I can still picture us all sitting as a family on those Sundays, warmly laughing as the spring sun shined brightly through our vertical blinds.
Today, babushka’s potatoes are still one of my ultimate dishes and my most requested dish for my BBQs. However, I decided to put a little twist on them and instead of boiling them, pan roast them on the stove.
And the result? The easiest and fanciest potatoes you will ever make.
New potatoes are for some reason hard to find in the states. And the ones I have found, were not the same texture. But these little beauties are to die for. They are adorably cute and their buttery flavor and color is out of this world!

A Twist on Babushka’s Taters - Garlic
and Dill Pan-Roasted Taters
From Girl and the Kitchen
1.5
pounds baby Yukon golds
1/2 stick
of butter, divided in half
1/4 cup
of dill
5-6
cloves of garlic
salt and
pepper to taste
Instructions
1. First we wash them.
2. Then we add them to a stainless steel pan. Do NOT use non-stick. You wont get the same coloring on them.
3. And we cover them with water and throw in 4 tablespoons of butter.
4. Turn on the flame to high and close with a lid. Once they come to a boil, let them cook COVERED for 7 minutes, then remove the lid and let the water evaporated. Do not turn down the heat.
5. In the meantime, get about a handful of some fresh dill and chop it finely.
6. Then grab about 5-6 cloves of garlic and mince it on your microplaner.
7. Now, go check on them taters. Most of the water should have boiled out and what is left is a muggy liquid. That's what you are supposed to be left with. It's just butter, water and some potato starch. Go ahead and insert a knife in. If if it goes in smoothly you are ready to roll. Grab your potato smasher and GENTLY press on the potatoes just so they pop.
8. Gently, gently...see how they just are a little cracked? That's what you want.
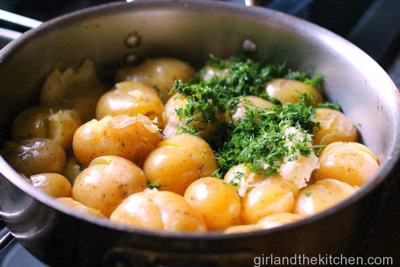
9. Let them continue cooking on one side for 6 minutes, then turn them over and let cook for 5 minutes on the other side. Add in your dill, garlic and the remaining butter. And, DUH, season with salt and pepper. Mix it all up…
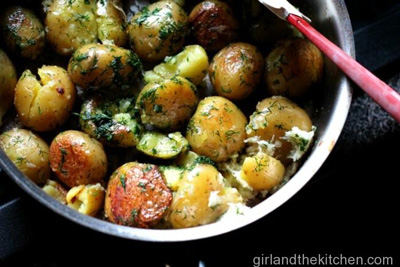
10. And you will see GORGEOUS rustic, browned and crispy goodness. Yes guys, they are amazeballs.
11. If you are not serving these immediately, place a towel over the pan, then cover with a lid. They will stay warm for quite some time insulated that way.


.jpg)


